✨ Upgrade your ride’s first impression with flawless chrome flair! 🚗
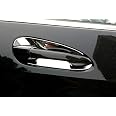
These ABS chrome door handle inserts are precision-engineered for Mercedes-Benz C, GLK, ML, GLE, GL, and GLS models from 2008 to 2018. Featuring a high-gloss chrome finish and easy 3M adhesive installation, this 4-piece set offers a durable, stylish upgrade that enhances your vehicle’s exterior with minimal effort.
| Material | Acrylonitrile Butadiene Styrene (ABS) |
| Brand | YIWANG |
| Color | Chrome,Silver |
| Product Dimensions | 1"L x 1"W |
| Exterior Finish | Chrome |
| Special Feature | Easy to Install |
| Included Components | Cover |
| Theme | Automobile |
| Item Weight | 6.7 Ounces |
| Unit Count | 1.0 Count |
| Number of Items | 4 |
| Manufacturer | YIWANG |
| Item Depth | 1 inch |
| UPC | 013056648775 |
| Room Type | Entryway |
| Indoor/Outdoor Usage | Outdoor |
| Item Weight | 6.7 ounces |
| Manufacturer Part Number | YIWANG |
| Special Features | Easy to Install |
J**N
These are really nice looking on our car.
Used for a newly purchased two year old Mercedes. And like that they are very beautiful on the car.
R**A
Did not fit
Wrong size for Mercedes 2017 c300 they were too long
R**S
Perfect fit
These chrome cups ADDED to my vehicle. Does not look cheap or tacky. Great purchase!
M**Y
Doesn’t fit 350GLE
To large for 350GLE SUV be aware
K**N
Someone will he need to check the specs on their products
This Product is not saved correctly it is too large this is the second time I’ve ordered this hoping it would look better it does not and I am not happy.
J**O
Door handles
They look amazing
K**N
Touch of class
Love the splash of class. Not too much just a touch of chrome
X**R
Great upgrade! With the chrome hood vents and these, we’re stylin’!
I added the exterior chrome door handle cups on my ‘17 Mercedes GLE350. They go great with the chrome hood vent covers.Installing was very easy. There are two for each side, mirror images of one another. To install, I recommend having the doors locked and the key not in your pocket so they won’t open when you pull the latch (assuming you have keyless entry).Find the corresponding insert for the first door. Checking fit and getting the insertion technique down first is a good idea. Leave the tape on and lift the latch handle. Slip the front end of the insert in first and slide it under the front of the latch handle. As you lift it a gap will appear that is perfect for the insert to slide under so the back will clear. Drop the back edge and jiggle it into position. Once you know how it works, pull it out again and remove the tape. Then carefully reinsert the insert, being sure not to let the tape touch the body until you’re ready. If it does, you can always lift it again and reposition but it’s probably best to keep the adhesive as strong as you can.What I found was I left the insert floating (not stuck down yet) and let the latch return to its normal position. This will help position the insert in the right spot and keep the latch handle from being blocked by the insert. The insert should *not* sit under the latch anywhere or it could interfere with the door mechanism. This happened on my first attempt but I just popped the insert loose and reset it.Once you get it where you want it, press hard along the places where the tape is to lock them in position.
Trustpilot
1 month ago
2 months ago